Table of Contents
ToggleWiring surround sound, mounting an 85-inch TV on drywall, and calibrating a 4K projector aren’t projects most homeowners tackle on a Saturday afternoon. Professional home theater setup services handle the heavy lifting, from running cable through walls to programming universal remotes, so the system works flawlessly without trial-and-error troubleshooting. Whether building a dedicated media room or upgrading a living room setup, understanding what pros bring to the table helps determine when their expertise is worth the investment versus going the DIY route.
Key Takeaways
- Professional home theater setup services handle complex installations like in-wall wiring, surround sound calibration, and projector mounting that require technical expertise and specialized tools to meet fire code and electrical standards.
- Home theater setup services range from basic living room upgrades ($500–$1,500) to dedicated Atmos systems ($5,000–$15,000+), with labor typically accounting for 30–50% of total project costs.
- DIY installation works for simple plug-and-play projects like soundbar placement or single-stud TV mounting, but professional help is essential for heavy displays, in-wall wiring, or smart home integration to avoid costly mistakes and ensure proper calibration.
- Qualified installers should hold CEDIA or THX certifications, carry liability insurance, conduct in-home assessments before quoting, and provide transparent warranties on both labor and equipment.
- Proper space preparation—including electrical verification, wall structure assessment, clearing obstacles, and network readiness—speeds up installation and prevents surprises that inflate labor costs.
What Are Home Theater Setup Services?
Home theater setup services provide end-to-end installation and configuration of audio-visual equipment. These aren’t tech store employees who drop off a soundbar, they’re technicians who assess room acoustics, design speaker placement for optimal sound staging, route low-voltage wiring to code, and integrate components into a cohesive system.
Typical service scope includes mounting displays (TVs, projectors, motorized screens), installing surround sound systems (5.1, 7.1, Dolby Atmos configurations), concealing wiring within walls or raceways, calibrating audio levels with decibel meters, and programming control systems (Logitech Harmony, Control4, Savant). Many also handle network infrastructure, running Cat6 Ethernet for 4K streaming or configuring mesh Wi-Fi to eliminate buffering during movie night.
Some providers specialize in high-end custom installations with acoustic treatment panels, soundproof drywall (like QuietRock), and motorized seating. Others focus on straightforward living room upgrades: wall-mounting a TV, connecting a receiver, and hiding cables behind trim. The common thread is technical expertise combined with attention to detail that prevents the “rats nest” of visible wires and mismatched component settings that plague many DIY setups.
When to Hire a Professional vs. DIY Your Home Theater
DIY makes sense for simple setups, mounting a TV on a single stud with a fixed bracket, placing a soundbar on a media console, or connecting an HDMI cable. If the room has existing outlets and the equipment is plug-and-play, most homeowners with basic hand tools (stud finder, level, drill/driver) can handle it in an afternoon.
Hire a pro when the project involves:
• In-wall wiring: Running speaker wire or HDMI cables through walls requires knowledge of fire blocking, staple spacing per NEC Article 725, and avoiding conflicts with plumbing or HVAC ducts. Mistakes can fail inspection or create fire hazards.
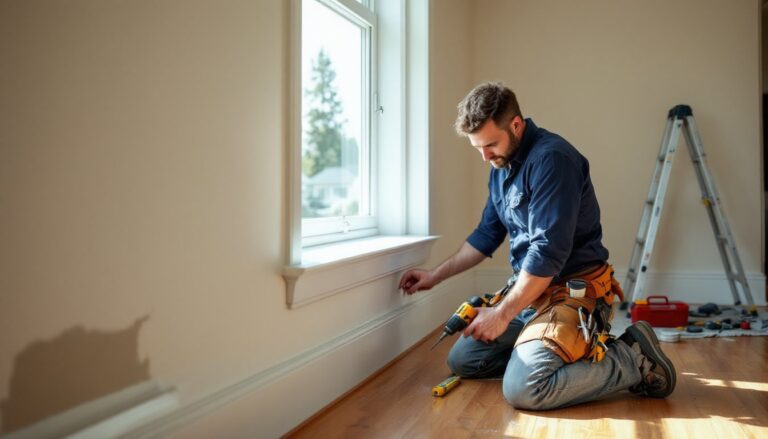
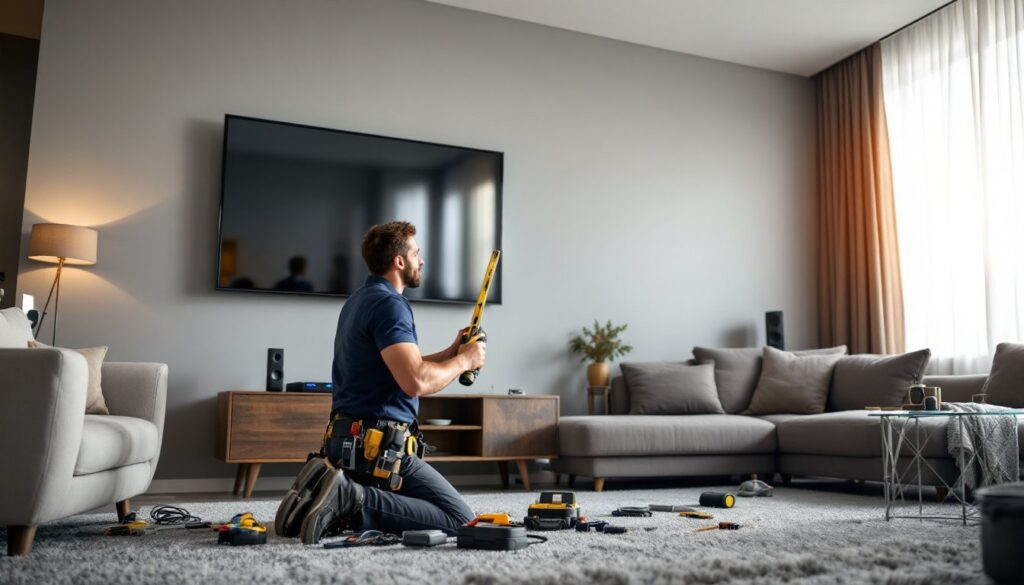
• Heavy displays: Mounting a 75-inch or larger TV (100+ lbs) demands blocking between studs or mounting to concrete/brick with appropriate anchors. A tilting or articulating mount adds complexity.
• Surround sound calibration: Proper speaker placement for a 7.1.4 Atmos system requires understanding arrival times, phase alignment, and crossover frequencies. Pros use measurement microphones and software (Audyssey, Dirac Live) for room correction.
• Projector installation: Ceiling-mounted projectors need precise throw distance calculation, keystone correction, and sometimes recessed junction boxes to hide cables. Aligning a 120-inch screen to a 1080p or 4K image with zero geometric distortion isn’t forgiving work.
• Smart home integration: Syncing lighting (Lutron, Philips Hue), motorized shades, and climate control with theater presets requires programming skills beyond plug-and-play hubs.
• Structural modifications: Cutting into load-bearing walls, adding soundproofing, or building custom cabinetry often requires permits and licensed contractors.
If the answer to “Can I fix this if it goes wrong?” is uncertain, or if the project requires specialized tools (cable fishing rods, tone generators, calibration microphones), professional help saves time and prevents costly do-overs. Even experienced DIYers benefit from consulting pros for home theater setup when tackling complex audio configurations.
What’s Included in Professional Home Theater Installation
Service packages vary, but standard installations typically include:
Equipment Placement and Mounting
TVs and projectors get mounted to spec: centered at eye level (40-45 inches for seated viewing), secured to studs with lag bolts (not drywall anchors for heavy loads), and leveled. Speakers are positioned per manufacturer guidelines, front left/right at ear height, center above or below the screen, surrounds 90-110 degrees to the side, and height channels for Atmos configurations.
Wiring and Cable Management
Pros run cables through walls using low-voltage retrofit boxes, conduit, or paintable cable channels. HDMI 2.1 cables (for 4K/120Hz gaming) are routed separately from AC power lines to prevent interference. Speaker wire gets terminated with banana plugs or binding posts. Everything meets NEC low-voltage wiring standards, no fire code violations.
System Configuration
Receivers get programmed with input labels, speaker sizes, crossover points (typically 80Hz for subwoofers), and distance settings. Pros calibrate video settings, disabling motion smoothing, setting color temperature to D65 standard, and adjusting brightness/contrast for ambient light. Audio calibration balances levels across all channels using an SPL meter, targeting 75dB reference level at the main listening position.
Network and Streaming Setup
Many services include connecting streaming devices (Apple TV, Roku, Nvidia Shield), configuring wired Ethernet for stability, or optimizing Wi-Fi placement. Some handle Plex server setup or NAS integration for local media libraries.
Training and Documentation
Good installers walk clients through operation: powering on the system, switching inputs, adjusting volume, and basic troubleshooting. They leave behind labeled connections, remote programming, and contact info for future support.
Premium packages add acoustic analysis (measuring frequency response with REW software), DSP tuning for room modes, custom control interfaces, and ongoing maintenance plans. Specialized installers listed on Angi often provide these higher-tier services for dedicated home theaters.
How to Choose the Right Home Theater Setup Service
Not all installers are created equal. Start with these qualifications:
Licensing and Insurance
Verify the company is licensed for low-voltage work (requirements vary by state). Confirm they carry general liability insurance and workers’ comp. If the job involves electrical work beyond low-voltage (adding circuits, outlet relocation), they should be licensed electricians or partner with one.
Certifications
Look for CEDIA (Custom Electronic Design & Installation Association) certification, which indicates training in audio/video design and installation standards. THX certification signals expertise in calibration. HAA (Home Automation Association) credentials matter for smart home integration.
Portfolio and References
Review photos of past installs, clean wiring, thoughtful speaker placement, and integrated aesthetics demonstrate attention to detail. Ask for references and check reviews on platforms like HomeAdvisor for feedback on professionalism and post-install support.
Consultation Process
Reputable installers conduct in-home assessments before quoting. They’ll measure the room, identify obstacles (ductwork, wiring paths), discuss viewing habits, and recommend equipment appropriate to the space and budget. Avoid companies pushing specific brands without justifying why they fit the project.
Warranty and Support
Confirm warranty coverage: labor (typically 1 year), equipment (manufacturer terms), and what happens if components fail post-install. Ask if they offer service plans for system updates, recalibration, or troubleshooting.
Equipment Sourcing Flexibility
Some installers require purchasing equipment through them (often at markup). Others will install client-purchased gear for a labor-only fee. Clarify the policy upfront to avoid surprises. For homeowners exploring broader Wayfair Home Services options, understanding installation partnerships can simplify purchasing and setup.
Average Costs for Home Theater Installation Services
Pricing depends on system complexity, room size, and regional labor rates. These 2026 estimates assume mid-range equipment and standard installations:
Basic Living Room Setup ($500–$1,500)
Wall-mount a TV, connect a soundbar or receiver with front speakers, run HDMI cables, and basic calibration. Includes concealing cables through one wall.
Mid-Range Surround Sound ($1,500–$4,000)
5.1 or 7.1 speaker system with in-wall wiring, AV receiver setup, projector or large TV mounting, acoustic calibration, and universal remote programming.
Dedicated Home Theater ($5,000–$15,000+)
7.1.4 Dolby Atmos system with in-ceiling speakers, acoustic treatment, projector with motorized screen, tiered seating, smart lighting integration, and network infrastructure. Labor accounts for 30–50% of total cost.
Hourly Rates
Installers typically charge $75–$150/hour depending on region and expertise. Complex calibration or custom programming may hit $200/hour for specialized techs.
Additional Costs
• In-wall wiring per drop: $50–$150
• Acoustic panel installation: $200–$500
• Projector ceiling mount (recessed): $300–$600
• Smart home integration: $500–$2,000
• Furniture assembly (theater seating): $100–$300
Equipment prices fluctuate wildly, a quality 4K projector ranges $800–$5,000, while speakers span $200 (bookshelf pair) to $2,000+ (tower mains). Get itemized quotes separating labor from parts. Reviews on Digital Trends often highlight the latest equipment trends and pricing benchmarks.
Regional variations matter: urban markets (LA, NYC, San Francisco) run 20–40% higher than rural areas. Always get three quotes before committing, especially for projects exceeding $3,000.
Preparing Your Space for Professional Installation
Proper prep speeds up installation and prevents surprises that inflate costs.
Clear the Work Area
Remove furniture, wall art, and breakables from the installation zone. Installers need access to walls, ceilings, and outlets without navigating obstacles. If they’re running cable through walls, clear adjacent rooms where they might need attic or crawlspace access.
Verify Electrical Capacity
Home theaters draw significant power, receivers (200–500W), subwoofers (300–1,000W), projectors (200–400W), and displays (150–400W). Ensure the room has dedicated 15-amp or 20-amp circuits without overloading. If adding outlets, hire an electrician beforehand.
Assess Wall and Ceiling Structure
Inform installers about wall types (drywall, plaster, brick) and ceiling access (open attic, finished second floor). Homes with metal studs require different anchors than wood framing. Popcorn ceilings complicate in-ceiling speaker installation.
Plan for Ambient Light Control
If installing a projector, address light bleed from windows. Blackout shades, curtains, or motorized blinds prevent washed-out images. Discuss lighting placement with installers, dimmable LEDs on wall sconces prevent screen glare.
Network Readiness
Run Cat6 Ethernet to the theater location if possible, wired connections eliminate streaming hiccups. If using Wi-Fi, ensure the router provides strong signal or plan for a mesh node. Streaming 4K HDR content requires sustained 25+ Mbps per device.
Equipment Unboxing
If the installer isn’t supplying gear, unbox everything and verify it matches the order. Test power-on before installation day, returning defective equipment mid-install delays the project.
Permits
Check local requirements. Most low-voltage AV work doesn’t need permits, but electrical upgrades, structural modifications, or commercial-grade sound systems might. The installer should advise, but confirming with the building department prevents compliance issues.
Conclusion
Professional home theater setup services transform a pile of equipment into a dialed-in entertainment system without the headaches of miswired speakers or crooked TV mounts. For complex installs, in-wall wiring, Atmos calibration, or smart home integration, the expertise pays for itself in time saved and performance gained. Simpler projects might stay DIY territory, but knowing when to call in a pro ensures the investment delivers the cinematic experience homeowners expect.